Security
SSH keys
SSH keys provide secure, password-less access to your virtual machines.
On this page7 sections
What are SSH keys?#
SSH keys are a pair of cryptographic keys used for authentication. The private key stays on your computer, while the public key is added to your VM. When you connect, the server verifies that you have the matching private key.
Supported key types#
- Ed25519 (recommended)
- RSA (2048-bit minimum)
- ECDSA
Generating an SSH key pair#
If you don’t already have an SSH key, you can generate one in your terminal. On Windows, use PowerShell or Windows Terminal, or PuTTYgen if you prefer a graphical interface.
# Generate an Ed25519 key (recommended)
ssh-keygen -t ed25519 -C "your_email@example.com"

# Or generate an RSA key (wider compatibility)
ssh-keygen -t rsa -b 4096 -C "your_email@example.com"ssh-keygen -t ed25519 -C "your_email@example.com"When prompted:
- Press Enter to save to the default location (
~/.ssh/id_ed25519). - Optionally enter a passphrase for extra security.
View your public key#
# Ed25519
cat ~/.ssh/id_ed25519.pub

# RSA
cat ~/.ssh/id_rsa.pub
The output will look something like this:
ssh-ed25519 AAAAC3NzaC1lZDI1NTE5AAAAI... your_email@example.comAdding SSH keys to your account#
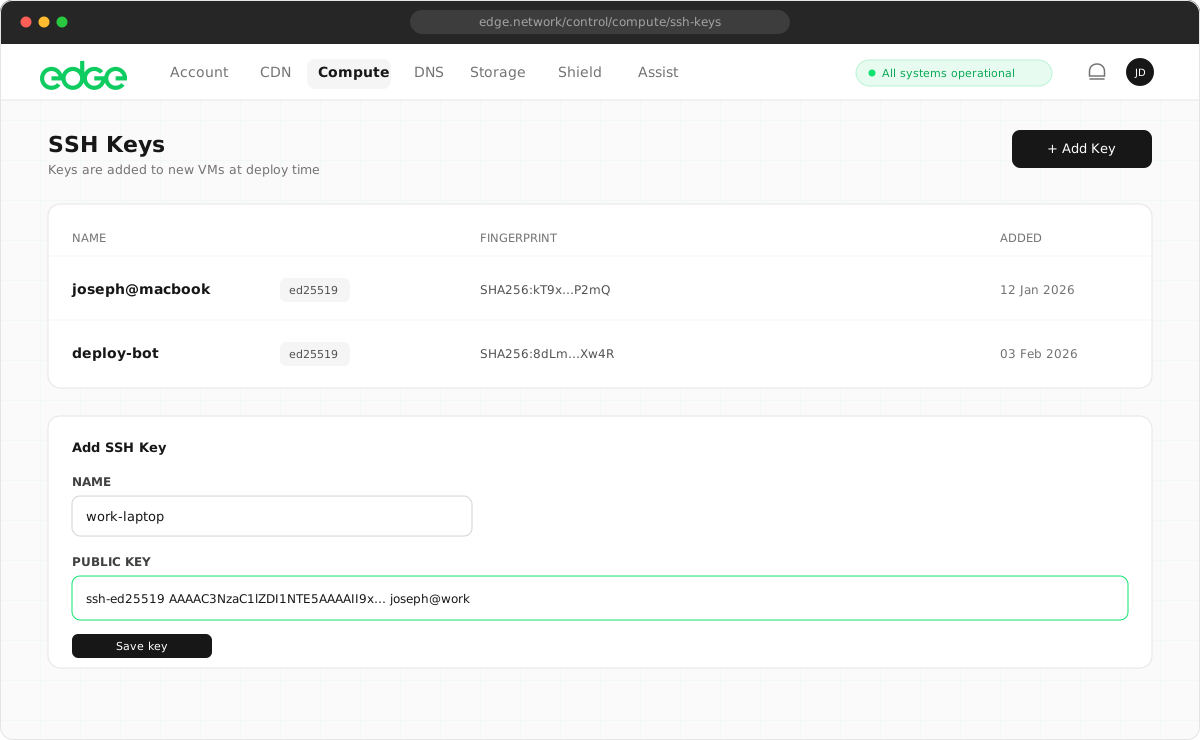
Add your public key to Edge Network so it can be installed on your VMs.
- Navigate to Resources → SSH Keys in the console.
- Click Add SSH Key.
- Paste your public key (the entire line starting with
ssh-). - Give it a descriptive name (e.g. “MacBook Pro” or “Work Laptop”).
- Click Add Key.
Using SSH keys with VMs#
When creating a VM#
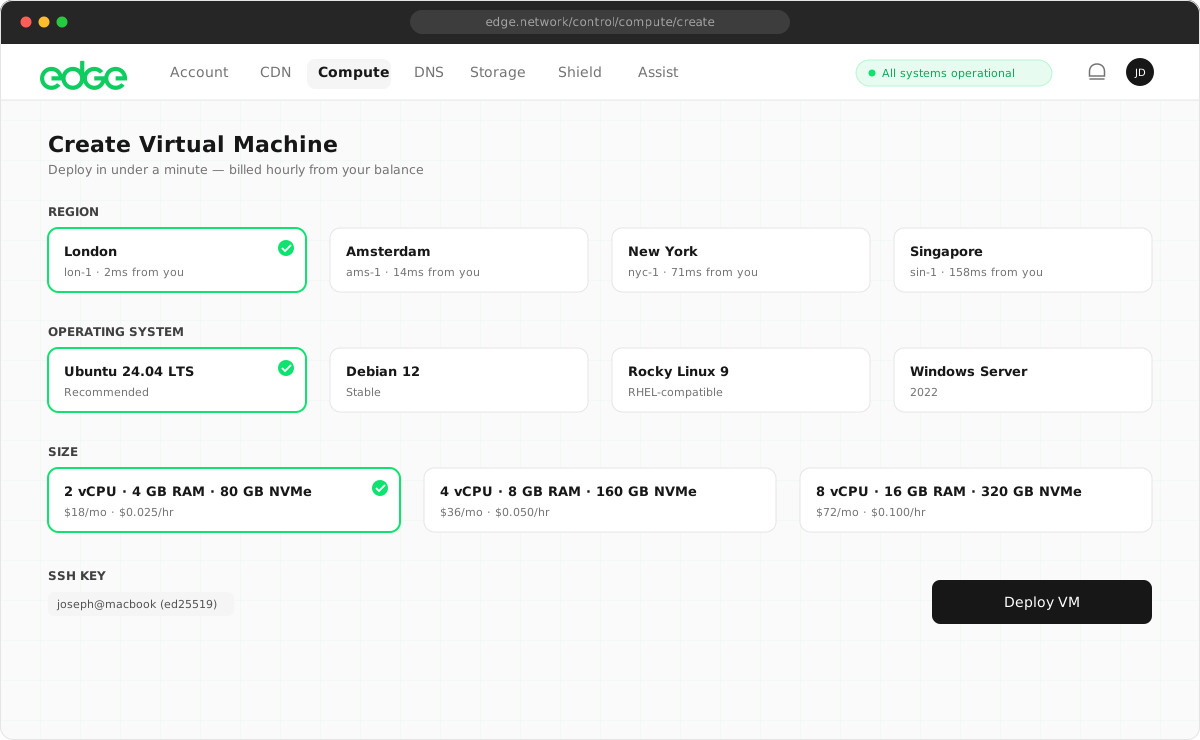
During VM creation, you’ll be prompted to select one or more SSH keys. These keys are installed in the root user’s ~/.ssh/authorized_keys file.
Connecting to your VM#
# Connect as root
ssh root@YOUR_VM_IP

# If your key is in a non-default location
ssh -i ~/.ssh/my_custom_key root@YOUR_VM_IP
Adding keys to an existing VM#
Currently, SSH keys are only installed during VM creation. To add keys to an existing VM, add them manually to the authorized_keys file:
# SSH into your VM first, then:
echo "your-public-key-here" >> ~/.ssh/authorized_keys
Managing your keys#
Viewing keys#
Your SSH keys are listed at Resources → SSH Keys. Each key shows:
- The name you assigned
- The key fingerprint (for verification)
- The date it was added
Deleting keys#
To delete a key from your account:
- Go to Resources → SSH Keys.
- Click the trash icon next to the key.
- Confirm the deletion.
Best practices#
- Use Ed25519 keys: Ed25519 keys are shorter, faster and more secure than RSA.
- Use a passphrase: protect your private key with a passphrase. Use
ssh-agentto avoid typing it repeatedly. - One key per device: generate a unique key for each device, so you can revoke access per device.
- Never share private keys: your private key should never leave your device. Only share the public key.
Troubleshooting#
“Permission denied (publickey)”#
- Ensure you selected the correct SSH key when creating the VM.
- Check that your private key file has the correct permissions:
chmod 600 ~/.ssh/id_ed25519. - Verify you’re using the right key: run
ssh -v root@IPto see verbose output.
“Key already exists”#
Each public key can only be added once. If you see this error, check your existing keys. It may already be there under a different name.
“Invalid key format”#
Make sure you’re pasting the public key (ending in .pub), not the private key. The key should start with ssh-ed25519 or ssh-rsa.
Something unclear or out of date? Tell us