Security
Firewall
Control network traffic to and from your VMs with firewall rules.
On this page7 sections
Overview#
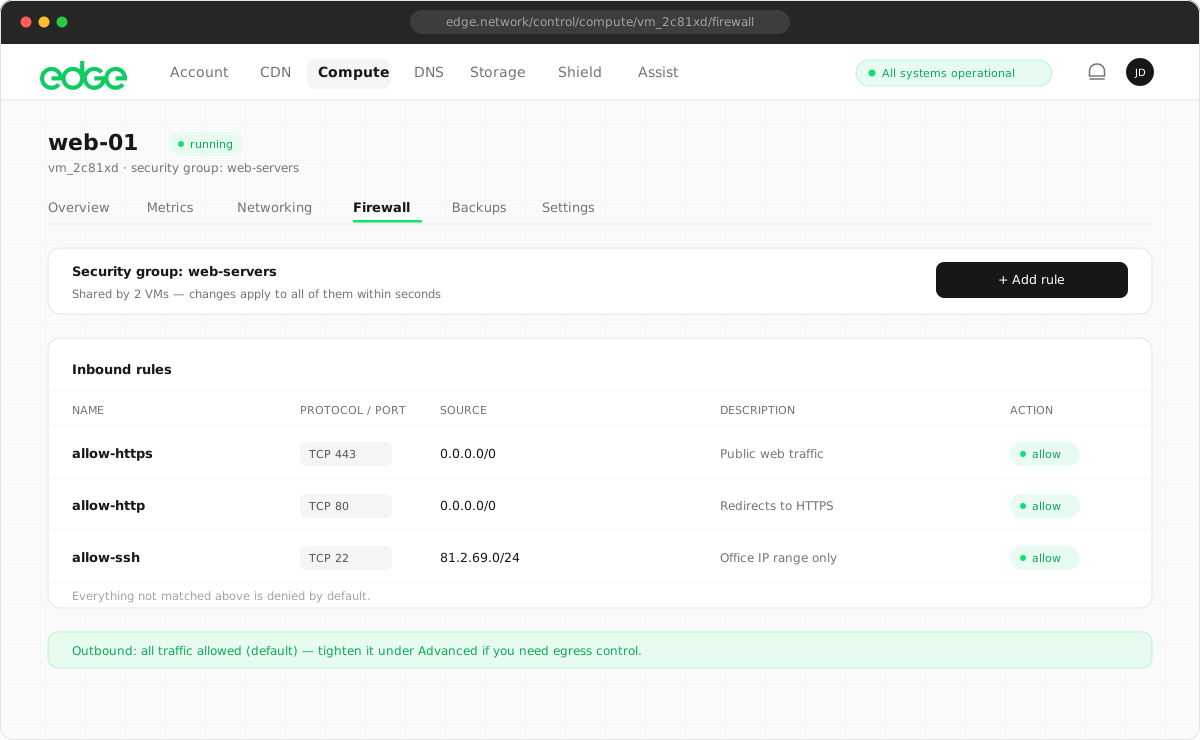
The Edge Firewall controls inbound and outbound traffic to your VMs using security groups. Security groups are collections of rules that define which ports and protocols are allowed. Each VM can have multiple security groups attached.
- Security groups: reusable sets of firewall rules. Attach them to any VM to apply the same rules across your infrastructure instantly.
- Default deny: when enabled, the firewall blocks all inbound traffic except what’s explicitly allowed by attached security groups.
Enabling the firewall#
The Edge Firewall can be enabled or disabled per VM. When disabled, all traffic flows freely. When enabled, only traffic matching your security group rules is allowed through.
- Navigate to your VM in the console.
- Click the Firewall tab.
- Use the Enable / Disable button at the top of the page.
Security groups#
Security groups are reusable collections of firewall rules. Each account comes with a set of default security groups that cover common use cases.
Default security groups#
| Name | Ports | Description |
|---|---|---|
allow-ssh |
TCP 22 | SSH access |
allow-web |
TCP 80, 443 | HTTP and HTTPS |
allow-ping |
ICMP | Ping / ICMP echo |
allow-all-outbound |
All | Unrestricted outbound traffic |
Attaching security groups#
- Navigate to your VM’s Firewall tab.
- Under Available Security Groups, click Attach next to the group you want.
- The rules take effect immediately.
Creating custom security groups#
- Go to Compute → Firewall in the console.
- Click Create Security Group.
- Add rules specifying protocol, port range, source CIDR and action.
- Save and attach the group to your VMs.
Common firewall rules#
Here are example rules for common use cases.
Web server (HTTP/HTTPS)#
| Protocol | Port | Source | Action |
|---|---|---|---|
| TCP | 80 | 0.0.0.0/0 (any) |
Allow |
| TCP | 443 | 0.0.0.0/0 (any) |
Allow |
SSH (restricted to your IP)#
More secure than allowing SSH from anywhere.
| Protocol | Port | Source | Action |
|---|---|---|---|
| TCP | 22 | YOUR_IP/32 |
Allow |
Database (private network only)#
Allow database connections only from your private network.
| Protocol | Port | Source | Action |
|---|---|---|---|
| TCP | 5432 (PostgreSQL) | 10.185.0.0/24 |
Allow |
Allow ping (ICMP)#
| Protocol | Type | Source | Action |
|---|---|---|---|
| ICMP | Echo Request | 0.0.0.0/0 (any) |
Allow |
How it works#
When the firewall is enabled, it operates on a default-deny basis:
- All inbound traffic is blocked unless a security group explicitly allows it.
- Established connections (return traffic) are always allowed.
- ICMP is allowed when the allow-ping group is attached.
- Outbound traffic is allowed when allow-all-outbound is attached.
- ARP and DHCP traffic is always permitted for network connectivity.
Rules from all attached security groups are combined: if any group allows a port, it’s open.
Best practices#
- Principle of least privilege: only open ports that your application needs. Close everything else.
- Restrict SSH access: limit SSH to your IP address or a VPN range instead of allowing it from anywhere.
- Use private networks for internal services: databases and other internal services should only be accessible via private networks.
- Review rules regularly: remove rules for services you no longer use.
Troubleshooting#
Can’t connect to my service#
Check that you have an inbound rule allowing traffic on the correct port. Make sure the service is actually running on your VM (sudo netstat -tlnp).
Locked out of SSH#
Use the VNC console in the Edge console to access your VM and fix the firewall rules. The VNC console works regardless of firewall settings.
Rules not taking effect#
Check that the Edge Firewall is enabled on the VM’s Firewall tab. When disabled, all traffic flows freely regardless of security groups. Also verify that the correct security groups are attached.
Firewall disabled after migration#
VMs migrated from a previous infrastructure have the firewall disabled by default. Navigate to the Firewall tab and click Enable to activate it. Make sure allow-ssh is attached first to avoid being locked out.
Something unclear or out of date? Tell us