Getting started
Deploy your first VM
This guide walks you through creating and connecting to your first virtual machine on Edge Network.
On this page5 sections
Prerequisites#
- An Edge Network account (sign up here)
- An SSH key pair (we’ll show you how to create one if you don’t have one)
- An SSH client (Terminal on macOS/Linux, or PuTTY on Windows)
1. Add an SSH key#
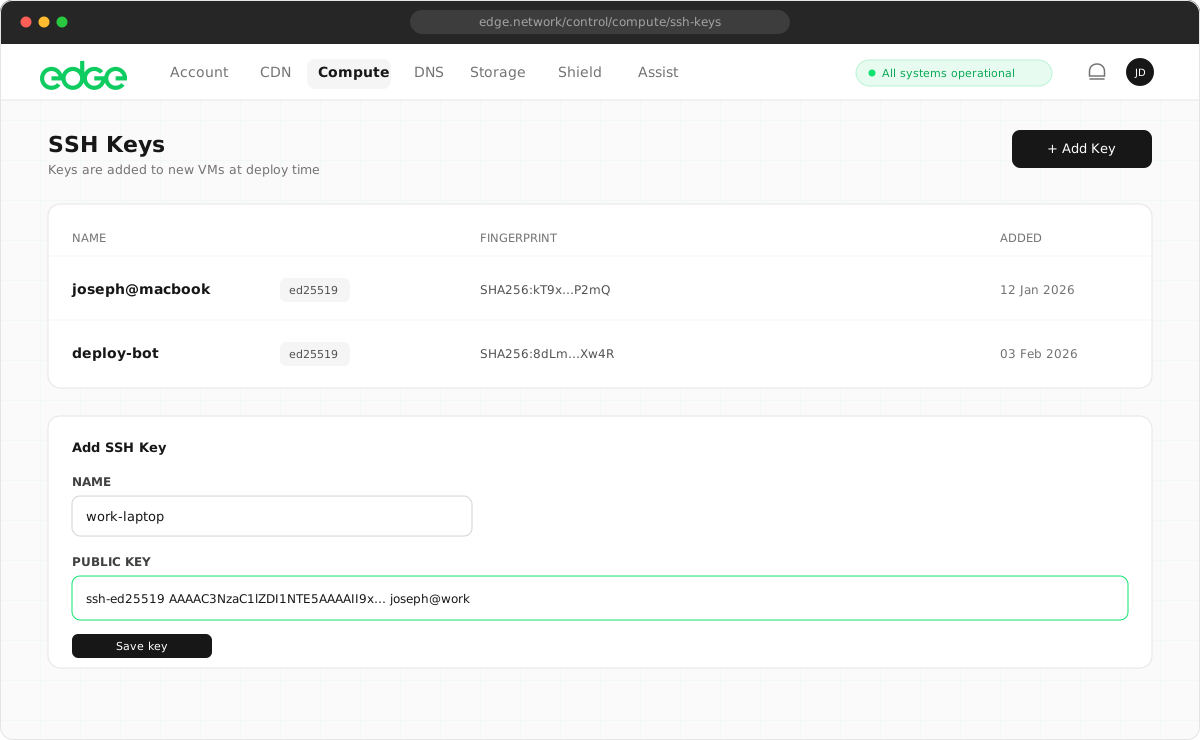
Before creating a VM, you’ll need to add an SSH key. This allows you to connect to your VM securely without a password.
Generate a new SSH key (if you don’t have one):
Terminal
ssh-keygen -t ed25519 -C "your_email@example.com"Press Enter to accept the default file location. Optionally add a passphrase for extra security.
- Navigate to Resources → SSH Keys in the console.
- Click Add SSH Key.
- Paste your public key (the contents of
~/.ssh/id_ed25519.pub). - Give it a memorable name and click Add Key.
2. Create a virtual machine#
Now let’s create your first VM.
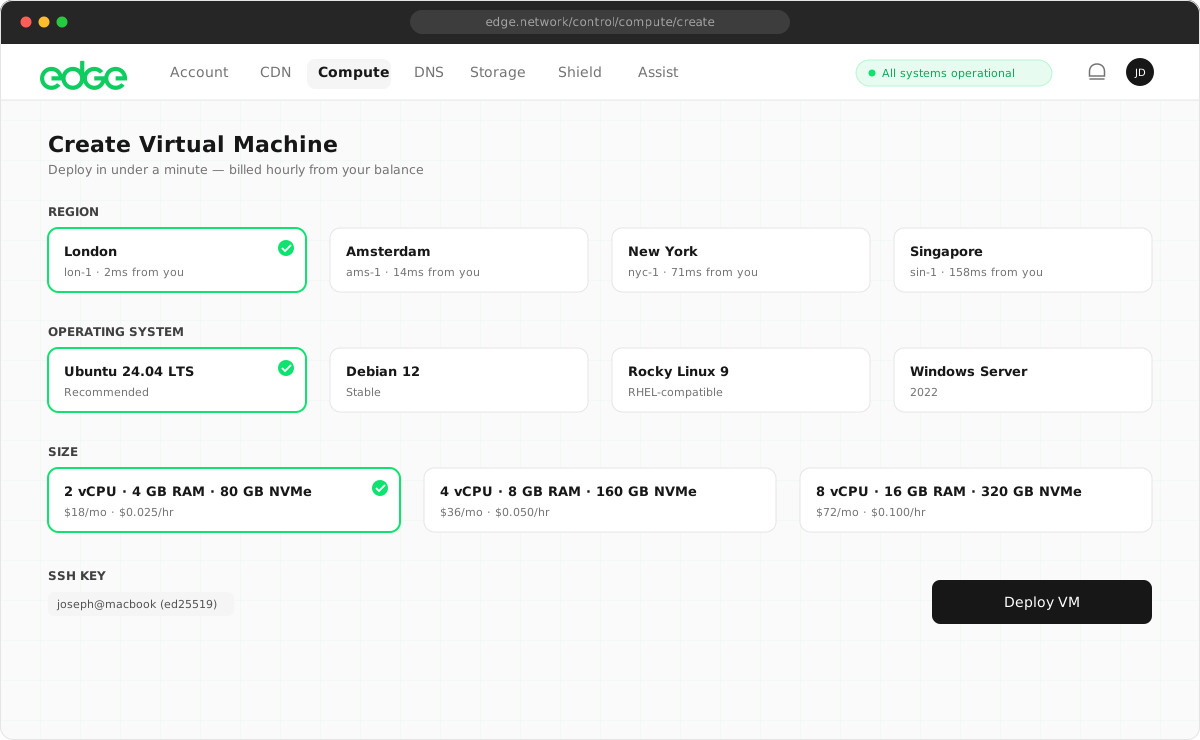
- Navigate to Compute in the sidebar.
- Click Create VM.
- Choose a region close to your users (or to yourself for testing).
- Select an operating system (Ubuntu 22.04 is a good default).
- Configure the resources:
- vCPUs: 1–2 for small workloads
- RAM: 2–4 GB for most applications
- Storage: 25–50 GB is a good starting point
- Select your SSH key.
- Give your VM a hostname.
- Click Create.
3. Connect to your VM#
Once your VM is running, you can connect via SSH.
-
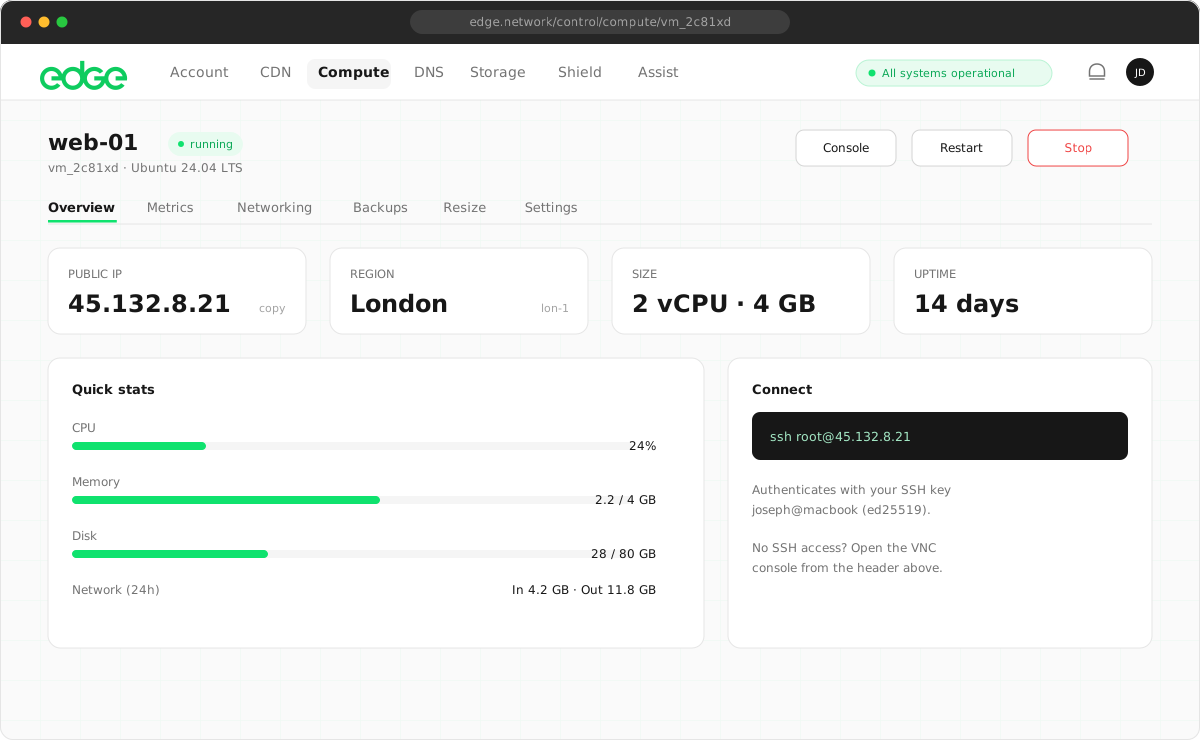
Click on your VM to view its details.
-
Copy the public IP address.
-
Open your terminal and connect:
Terminalssh root@YOUR_VM_IP
Replace YOUR_VM_IP with your VM’s actual IP address.
Next steps
Something unclear or out of date? Tell us